
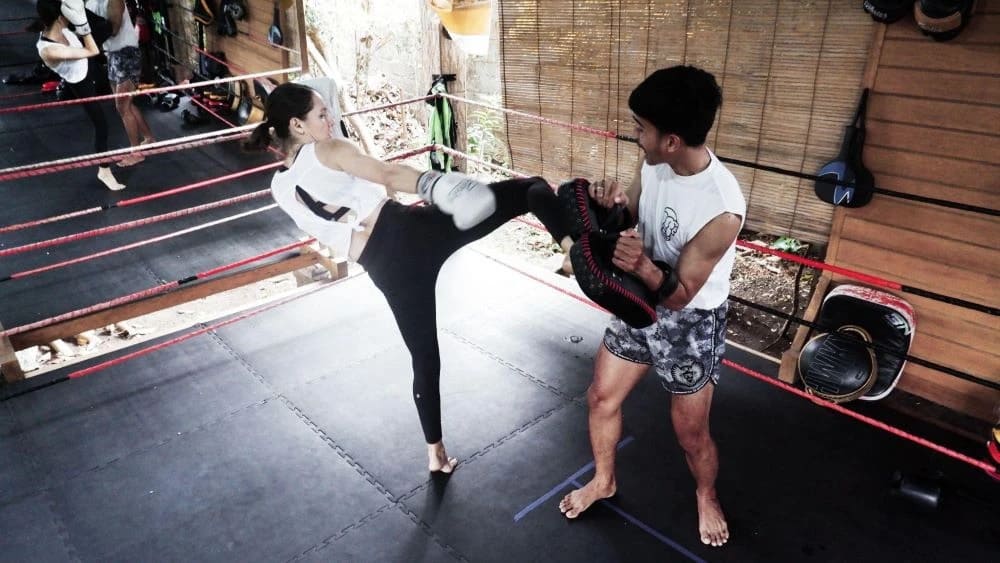
The Muay Thai roundhouse kick looks simple until you try to throw it correctly. Most gyms teach it in five minutes and never revisit it, which is why so many students kick with their foot for years and wonder why their shins bruise instead of their opponent’s ribs.
We’re going to fix that here. Below is the mechanics broken down step by step, a 4-week rep plan you can run alongside your regular classes, and the mistakes that quietly cap most beginners’ power long after they’ve “learned” the kick.
Why the Thai Roundhouse Is Different
Western kickboxing and karate round kicks snap from the knee and land with the foot or instep. The Thai version does something different. It swings through the target like a baseball bat. The hips lead the motion, the shin makes contact, and the whole body swings through rather than just the leg, which is exactly why it hurts so much more on the receiving end.
That difference changes what you should be training. A snapping kick rewards quick knee extension. A Thai roundhouse rewards hip rotation, timing, and a support foot that pivots all the way through, and training it like a snap kick will cap your power ceiling without you ever knowing why.
Step-by-Step Mechanics
Start with your stance. Weight balanced, hands up, eyes on the target.
- Step at 45 degrees. Before the kick even leaves the ground, your lead foot (on a rear-leg kick) steps slightly outward, about 45 degrees off your original line. This opens your hips toward the target instead of squaring them off.
- Pivot on the ball of the support foot. As the kicking leg lifts, your standing foot turns so the heel points roughly at the target. If the heel isn’t turning, the hip can’t fully open, and the kick will feel short and armless.
- Rotate the hip, not just the leg. Power comes from the hip driving the leg through the target. Think of the hip as the engine and the leg as along for the ride.
- Strike with the shin. The shin, not the foot or instep, makes contact. Kicking with the foot is painful, weaker, and far more likely to end in a broken toe than a stopped opponent.
- Counter-balance with the arms. As the kicking leg swings, the opposite arm drops or swings back for balance while the guard hand stays up. Skip this step and your kicks look tippy and off-balance, easy to spot from across the gym.
- Follow through, then reset. A good Thai kick doesn’t stop at the target. It swings through and past it, then the leg returns to a ready stance instead of dropping straight to the floor.
None of this happens fast at first, and that’s fine. Slow, correct reps beat fast, sloppy ones every time. That’s exactly why week one of the plan below has almost no speed in it at all.
The 4-Week Rep Plan
Here’s the part most guides skip. Watching a kick broken down frame by frame is useful, but it doesn’t tell you how many reps to do or when to add speed. This plan does both.
| Week | Focus | Reps / Sets | Notes |
| 1 | Slow air-kicks, form only | 3 sets of 15 per leg, daily | No speed. Check the pivot and hip rotation every rep. Use a mirror if you have one. |
| 2 | Bag work, add rotation | 5 rounds of 2 minutes, both legs | Focus on the pivot connecting to a full hip turn on contact. Half speed is fine. |
| 3 | Speed under a timer | 5 rounds of 1 minute, max clean kicks per round, both legs | Track your count each round. Form should hold even as speed goes up. |
| 4 | Combos and light sparring | 6 rounds of 3 minutes | Roundhouse mixed into jab-cross-kick and teep-kick combos, then live drilling with a partner. |
Week 1: Slow and Correct
By week one, we’re not trying to hit hard. We’re trying to groove the pattern until it becomes automatic, and that means every rep gets full attention: the 45-degree step, the pivot, the hip turn, all checked in the mirror if you have one, because you won’t feel mistakes you can clearly see.
Fifteen reps per leg, three sets, once a day, is enough. More than that and fatigue starts teaching you bad habits instead of good ones.
Week 2: Bag Work and Rotation
By week two we want the kick landing on something, so the bag comes in. The goal isn’t power yet. We’re checking whether the pivot built in week one survives actual contact.
Five two-minute rounds is plenty. Split them evenly between legs, and if the rear leg feels noticeably stronger than the lead, that’s normal. Train both anyway.
Week 3: Speed Under Pressure
This is where a lot of beginners fall apart, because speed tends to break form that felt solid when it was slow. Set a timer for one minute, throw as many clean reps as possible, rest, then repeat for five rounds.
Write your rep count down after each round. Watching that number climb across the week is the clearest sign the plan is working.
Week 4: Combos and Sparring
By week four, the kick shouldn’t be a solo move anymore. Fold it into jab-cross-roundhouse and teep-roundhouse combinations, then bring in light, controlled sparring or partner drilling so it has to work against someone who’s actually moving and reacting.
This is also where telegraphing gets exposed. A kick that looked fine on the bag often gets checked or dodged the second a live opponent can see it coming.
6 Common Mistakes
Kicking with the foot instead of the shin. The single most common error, and the easiest to miss, since it doesn’t feel wrong until your shins are still soft weeks later.
Not pivoting the support foot. A flat standing foot caps hip rotation immediately. If the heel isn’t turning, the kick is running on leg strength alone.
Telegraphing with a visible wind-up. Chambering the knee too high, too early, or too obviously hands your opponent a full second of warning. The best Thai kicks look almost lazy right up until they land.
Dropping the guard hand. The hand on the kicking side often drops the moment the leg lifts, which is exactly when a counter punch lands cleanest.
Rushing straight to speed. Skipping week one and going straight to hard bag work bakes in the same mistakes it’s supposed to fix, just faster.
Kicking only with the strong leg. Lead-leg kicks feel awkward early on and get skipped in favor of the stronger rear leg. That gap only grows the longer it’s ignored.
Bag vs Pads vs Air: Where to Drill What
Each tool teaches something different, and mixing them up wastes training time.
Air kicks are for mechanics. No resistance means no excuse, so this is where the pivot, the hip turn, and the balance get built without contact hiding the flaws.
The heavy bag is for contact and conditioning. It teaches the shin what real resistance feels like and builds the strength to follow through instead of bouncing off.
Pads, held by a coach or partner, are for timing and reaction. A pad holder can move, call combos, and force a kick at a real, shifting target rather than a fixed one, which is closer to what actually happens once sparring starts.
Use all three across the four weeks instead of picking one and sticking with it. Air work never fully disappears, even for advanced fighters, because form drifts a little without it.
How Long Until It Looks Good
Four weeks won’t make your roundhouse look like a Lumpinee veteran’s, and nobody should expect that. What four weeks of focused reps will do is fix the mechanics that actually matter: the pivot, the shin contact, the hip rotation.
Most beginners who follow a plan like this notice a real difference by the end of week two, usually in how the kick sounds on the bag rather than how it feels. A cleaner thud replaces the slap of a foot strike. From there, speed and power keep building for months, sometimes years, but the foundation is already in place, and everything after this plan is refinement rather than repair.
Shin conditioning matters here too. If the shins aren’t used to contact, no amount of correct technique makes bag work comfortable in the early weeks. Our guide to shin conditioning covers how to build that up safely alongside this plan.
Once the mechanics are solid, speed training drills pair well with week three, since raw hip speed compounds on top of the technique already built.
FAQ
How many roundhouse kicks should a beginner throw per day? Around 90 slow reps per leg in week one (3 sets of 15) is a solid starting point. Quality matters more than volume, so cut a set short the moment form breaks down.
Why does my shin hurt after throwing roundhouse kicks? Some soreness is normal as the shins adapt to contact, but sharp pain usually means the kick is landing on a bony, unconditioned spot rather than the flat of the shin.
Do I need to kick with both legs equally? Yes. Most fighters lean on their stronger leg by instinct, but an opponent finds the weak side eventually. Split reps evenly from week one onward.
How long does it take to throw a fast, hard roundhouse kick? Four weeks is enough to fix the mechanics. Real speed and power keep developing for months after that, especially once combos and sparring get involved.
Can I do this plan without a heavy bag? Air kicks and pad work can substitute in weeks one and two, but a bag becomes useful by week two for teaching the shin what real contact feels like.


One Comment