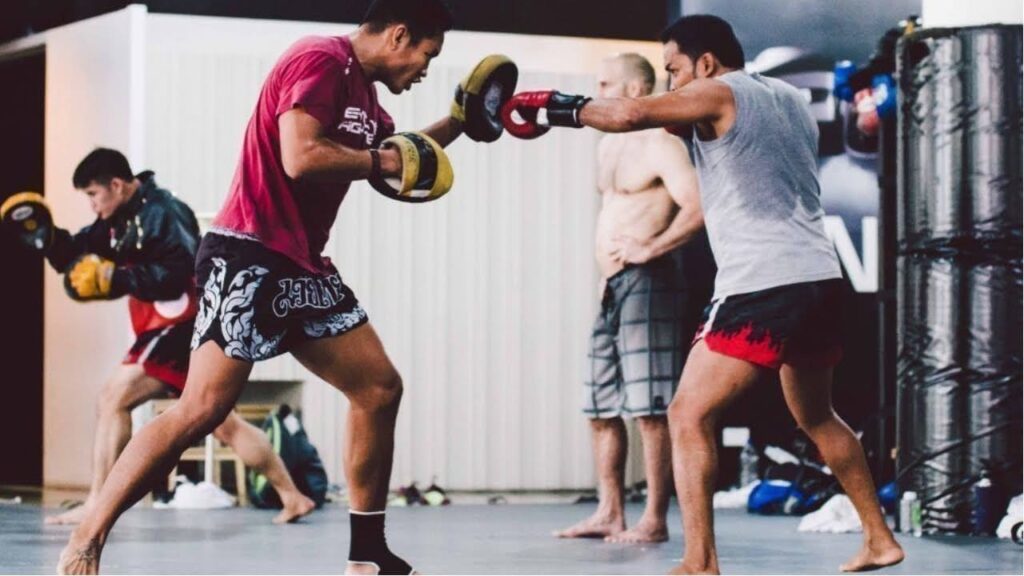

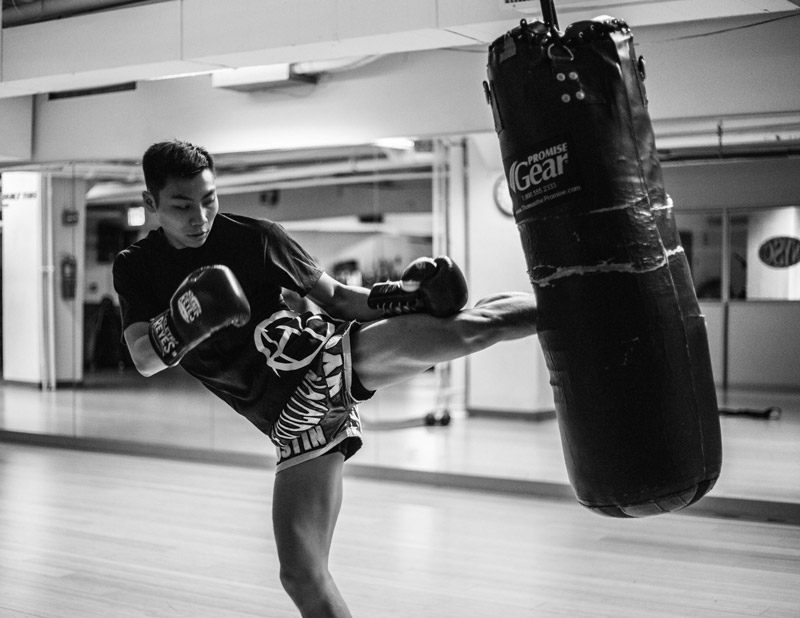
Walk into a gym in Bangkok and watch how quietly fighters hit the bag. No grunting, no wild haymakers, no bag swinging off its chain like it insulted someone’s mother. The strikes land clean, controlled, almost metronomic. Compare that to a typical Western gym, where a bag session often looks like a demolition job, and the gap in approach explains a lot about why Thai-trained fighters develop such tight range and rhythm years before they ever step into a ring with an opponent.
Most bag-work videos online show combinations without a plan for the round, the rest, or the progression. This article lays out three complete workouts, broken down round by round, so anyone with a bag and a timer can follow along without guessing.
The Thai Approach: Light, Technical, Never Smashing
Thai gyms treat the heavy bag as a mirror, not a punching bag in the American sense. The goal on any given round is rarely maximum force. It’s accuracy, footwork, and the ability to reset after every combination, because that’s what a fight actually rewards. A fighter who can land a teep, retract the leg, and be back in stance before the bag swings back has learned something a power-swinger hasn’t.
This shows up in how Thai trainers structure sessions. Technical rounds come first, at low-to-medium power, with the trainer or fighter calling out combinations. Only later, closer to a fight, does the pace pick up. Even then, the emphasis stays on landing clean rather than landing hard. Bag work is treated as skill rehearsal that happens to build conditioning as a side effect, not a strength-and-power session that happens to involve a bag.
The three routines below follow that logic. Each one has a different job. None of them ask you to just hit the bag until your arms give out.
Routine 1: Beginner Technique (5 x 3-Minute Rounds)
This routine is built for someone who already knows the basic strikes but hasn’t drilled them with structure. Each round has one job. Rest one minute between rounds.
Round 1: Jab and Cross, Nothing Else
Just the jab and the cross. Sixty seconds of jab only, then alternate jab-cross for the rest of the round. Watch your guard hand. It drops fast in round one, before fatigue even sets in, usually from habit rather than tiredness.
Round 2: The Teep Enters
Add the push kick, thrown off the lead leg. Jab, cross, teep. The teep should come from the hip, not the knee, and the standing leg should bend slightly on impact. Beginners tend to throw it stiff-legged, which is exactly how ankles get tweaked.
Round 3: Low Kick Focus
Drop the punches for stretches of this round and isolate the low kick. Throw it from both stances if you’re comfortable switching, otherwise stick to your dominant side and get twenty clean reps in. Full hip rotation, shin contact, not the foot.
Round 4: Elbows and Simple Combos
Introduce a horizontal elbow off a jab feint. Three-piece combos only: jab, cross, low kick. Or jab, teep, elbow. Keep it simple. This round is where most beginners try to get fancy and lose form doing it.
Round 5: Everything, Slow
Combine all four tools at a pace slower than you think you need. Speed comes later. Right now the bag is teaching your body where each strike originates.
Routine 2: Fat-Burner Intervals (8 x 2-Minute Rounds)
Eight rounds, thirty seconds rest between each. This one borrows more from conditioning circuits than from technical sparring prep, though the strikes stay clean throughout.
How the 8 Rounds Break Down
Odd rounds (1, 3, 5, 7) run at a moderate, sustainable pace, roughly 70 percent effort, cycling through jab-cross-low kick combinations non-stop for the full two minutes. Even rounds (2, 4, 6, 8) push to 85-90 percent effort in 20-second bursts, four bursts per round with 10-second float periods where you keep moving but drop the intensity. By round six your shoulders will be arguing with you. That’s the point.
This structure mimics how a fight actually feels: sustained work punctuated by sudden spikes when an opening appears. It also happens to torch more calories than steady punching because of the repeated intensity changes, not because any single round is brutal.
Leg conditioning matters just as much here as arm endurance. A lot of fighters skip that half of the equation entirely; anyone building serious bigger calves for kicking power will notice this interval structure taxes the calves almost as hard as the shoulders by round seven.
Routine 3: Fight Prep (5 x 5-Minute Rounds) with Clinch Knees
Five-minute rounds, one-minute rest, matching actual fight length. This is not a beginner routine. It assumes solid technique already exists and the goal now is simulating fight pace and fight decisions.
Round 1: Feeling Out
Move around the bag like it’s an opponent circling you. Light jabs, teeps to gauge range, no committed power. Footwork matters more than output here.
Round 2: Combination Pressure
Three- and four-strike combinations, thrown with intent to close distance and then exit at an angle. No standing in front of the bag trading. Circle out after every combo.
Round 3: Clinch Entry and Knees
This is where the clinch comes in. Step in on a combination, grab the bag (or a strap if your bag has one) around the neck, and throw two to three knees before releasing and stepping back. Repeat that entry pattern eight to ten times across the round. The clinch is where a huge share of Muay Thai fights get decided, and it’s the piece almost every bag routine online skips entirely.
Round 4: Championship Pace
Highest output round of the five. Combinations, low kicks, clinch entries, all mixed, minimal rest between exchanges. Push the pace like it’s the third round of a real fight and you need the judges to notice.
Round 5: Composed Finish
Drop back to round-one intensity but keep the sharpness. This round trains the ability to finish clean and controlled even when tired, which is precisely the skill that separates fighters who fade from fighters who close strong.
| Round | Beginner (5×3) | Fat-Burner (8×2) | Fight Prep (5×5) |
| 1 | Jab and cross only | Moderate pace, full combos | Feeling out, light teeps |
| 2 | Add the teep | 85-90% bursts x4 | Combination pressure |
| 3 | Low kick focus | Moderate pace, full combos | Clinch entry and knees |
| 4 | Elbows and 3-piece combos | 85-90% bursts x4 | Championship pace |
| 5 | Combine everything, slow | Moderate pace, full combos | Composed finish |
| 6 | – | 85-90% bursts x4 | – |
| 7 | – | Moderate pace, full combos | – |
| 8 | – | 85-90% bursts x4 | – |
Why Does the Banana Bag Feel Different?
Anyone who has switched from a standard cylindrical bag to a banana bag notices it within the first round. The shape is the whole story. A standard bag is a straight column, evenly padded top to bottom, built mainly for punches and the occasional kick landed somewhere in the middle third. A banana bag tapers, wider at the top and narrower toward the bottom, roughly mimicking the shape of a torso sitting above legs.
That taper changes how low kicks and teeps land. On a standard bag, a low kick thrown at shin height often connects with a flat, overpadded surface that absorbs the strike without giving useful feedback on angle. On a banana bag, the narrower lower section lets the shin wrap around the target more like it would around an actual leg, which teaches better hip rotation and contact angle. The teep behaves differently too. A standard bag’s uniform width means a push kick just shoves mass in a straight line. The taper on a banana bag responds more like a body absorbing and redirecting force, closer to what actually happens when the kick lands on a person mid-torso.
| Feature | Standard Bag | Banana Bag |
| Shape | Straight cylinder | Tapered, wider at top |
| Low kick feedback | Flat, absorbs without angle cues | Wraps like a real leg |
| Teep response | Shoves in a straight line | Redirects like a torso |
| Best for | Punches, elbows, upper body combos | Kicks, teeps, full-range striking |
| Clinch knee training | Works fine | Works fine, no real difference |
Neither bag is wrong. A standard bag is still the better tool for punch power and elbow work, since the dense, even padding rewards straight-line force. The banana bag earns its keep specifically on the kicking game, which is the part most gyms outside Thailand under-train because their equipment doesn’t reward it.
5 bag work mistakes worth fixing:
- Trying to knock the bag off its chain. Power without accuracy teaches nothing except how to throw wild, off-balance strikes that would get countered in an actual exchange.
- Standing flat-footed and square. The bag doesn’t hit back, so it’s easy to forget stance and just plant. Real fights punish planted feet within seconds.
- Never resetting guard after a combination. Hands drop the instant the combo ends because there’s no consequence for it on a bag. That habit travels straight into sparring.
- Avoiding kicks on a standard bag because they feel awkward. The fix is adapting the angle or switching equipment, not cutting kicks from the session entirely.
- Running the same pace and round length for months. Beginner rounds, interval rounds, and fight-simulation rounds train different systems. Doing only one of the three eventually stalls progress no matter how many hours go into the bag.